


234# SpalshAlgo Intrablast TradingView Strategy
Janus Trader 2025
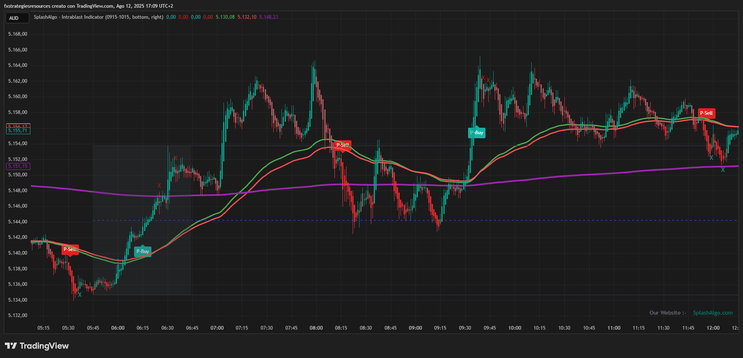
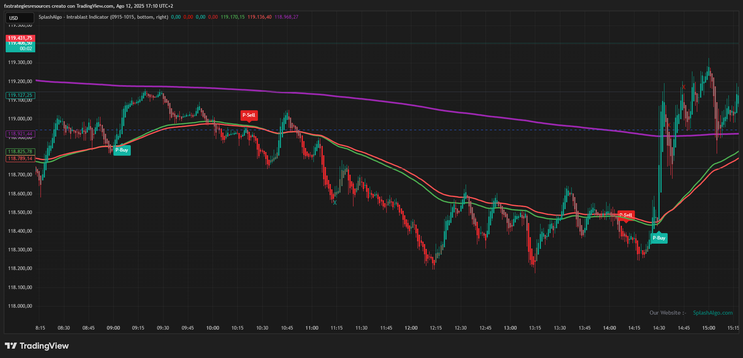
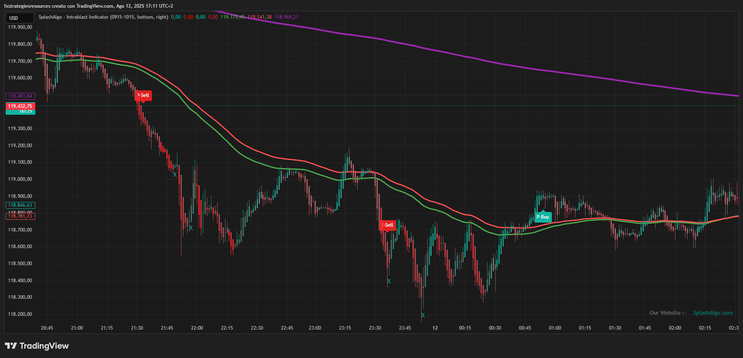
The SplashAlgo Intrablast strategy is designed for intraday traders who want to capture short-term momentum shifts using trend-based signals combined with Opening Range Breakout (ORB) zones. The system generates P-Buy and P-Sell labels after a four-candle confirmation pattern, ensuring trades are taken only when momentum has been validated. It also incorporates three key Exponential Moving Averages (EMAs) — 100, 120, and 1000 — to filter trades in the direction of the prevailing trend and identify key support/resistance areas.
Setup
-
Chart Type: Candlestick, intraday timeframes (e.g., 5min or 15min).
-
Indicators:
-
SplashAlgo Intrablast Indicator (as per the script).
EMA 100 (Green) – short-term momentum.
EMA 120 (Red) – mid-term trend filter.
EMA 1000 (Purple) – long-term support/resistance.
ORB zone (09:15–10:15 as per the code) with upper/lower and middle lines.
-
-
Colors:
-
Green candles = uptrend momentum.
Red candles = downtrend momentum.
-
-
Signals:
-
P-Buy label = long entry confirmation.
P-Sell label = short entry confirmation.
-

Buy Rules
Enter long when all the following conditions are met:
-
Signal Trigger: A P-Buy label appears on the chart.
-
Trend Confirmation:
-
Price is above EMA 100 and EMA 120.
EMA 100 is above EMA 120.
-
-
ORB Bias:
-
Price breaks and closes above the ORB high line.
-
-
Extra Confirmation: Avoid long trades if price is near EMA 1000 resistance unless broken.
Sell Rules
Enter short when all the following conditions are met:
-
Signal Trigger: A P-Sell label appears.
-
Trend Confirmation:
-
Price is below EMA 100 and EMA 120.
EMA 100 is below EMA 120.
-
-
ORB Bias:
-
Price breaks and closes below the ORB low line.
-
-
Extra Confirmation: Avoid shorts if price is near EMA 1000 support unless broken.
Exit Rules
-
Take Profit:
-
Conservative: Close at the opposite ORB line or nearest swing high/low.
Aggressive: Hold until opposite signal (P-Buy for shorts, P-Sell for longs).
-
-
Stop Loss:
-
Just below last swing low for longs.
Just above last swing high for shorts.
Or fixed %/ATR-based stop (e.g., 0.5–1 ATR).
-
-
Trailing Stop:
-
Optional: Use EMA 100 as a trailing stop guide.
-
Conclusion
This strategy combines momentum confirmation with structured breakout trading using ORB levels. The EMA alignment ensures trades are taken with the prevailing trend, reducing false entries. The multi-layered confirmation (signal label + EMA filter + ORB breakout) aims to maximize high-probability setups while minimizing whipsaws. Traders should backtest and adjust timeframes, ORB periods, and EMA settings to suit their preferred market and volatility conditions.
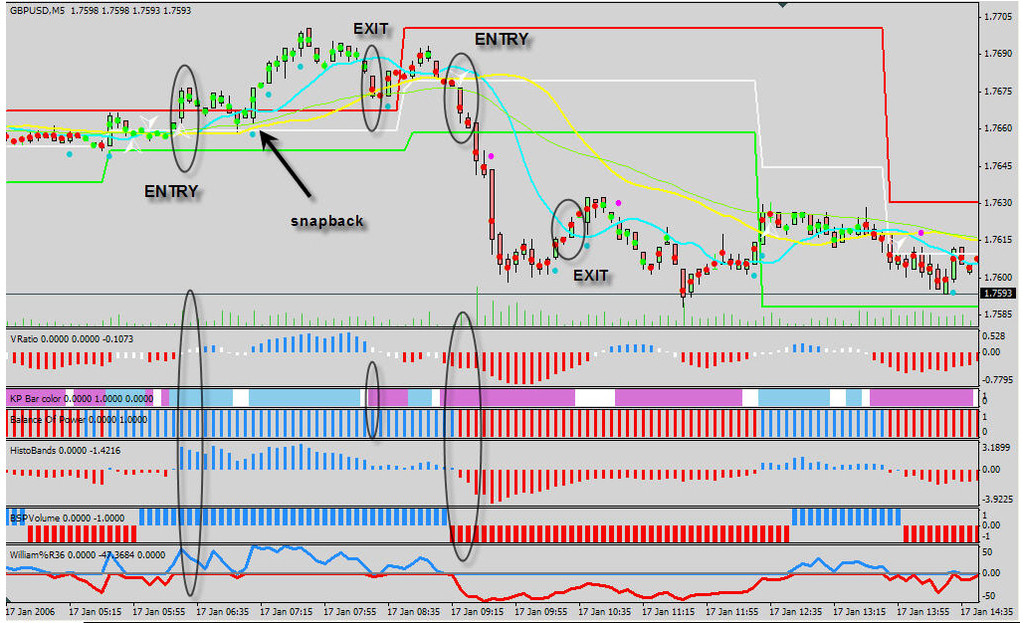
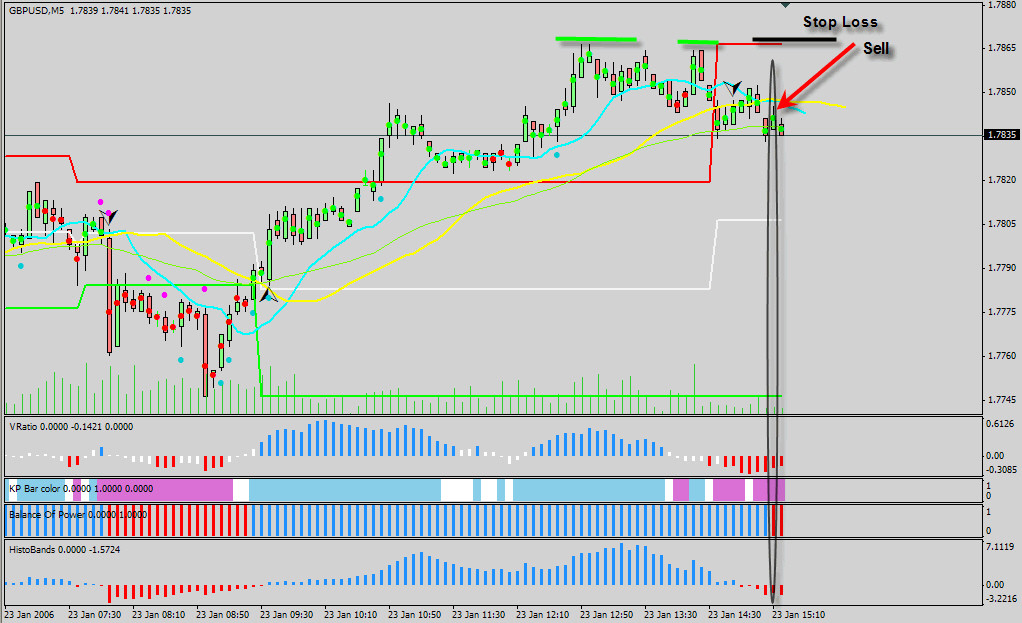
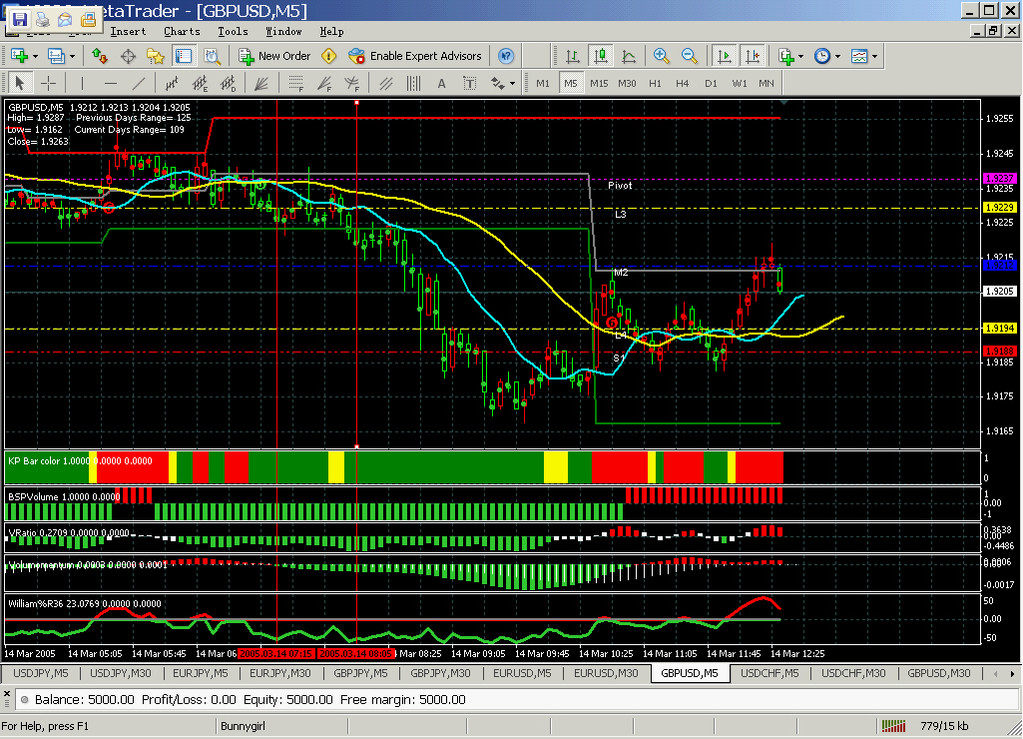
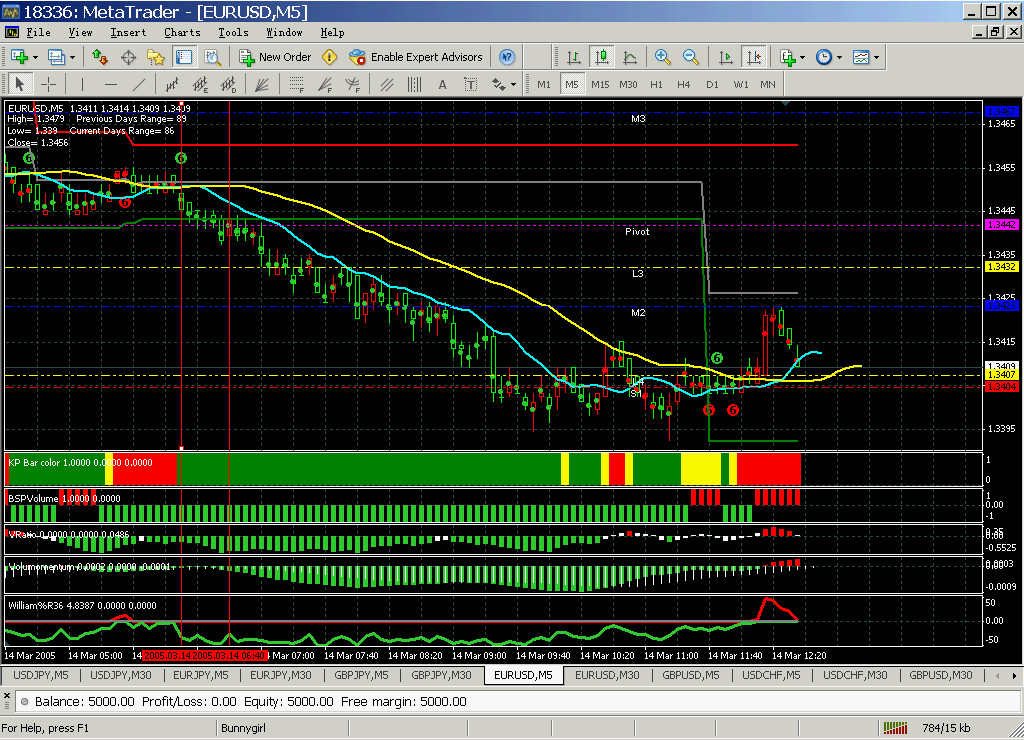
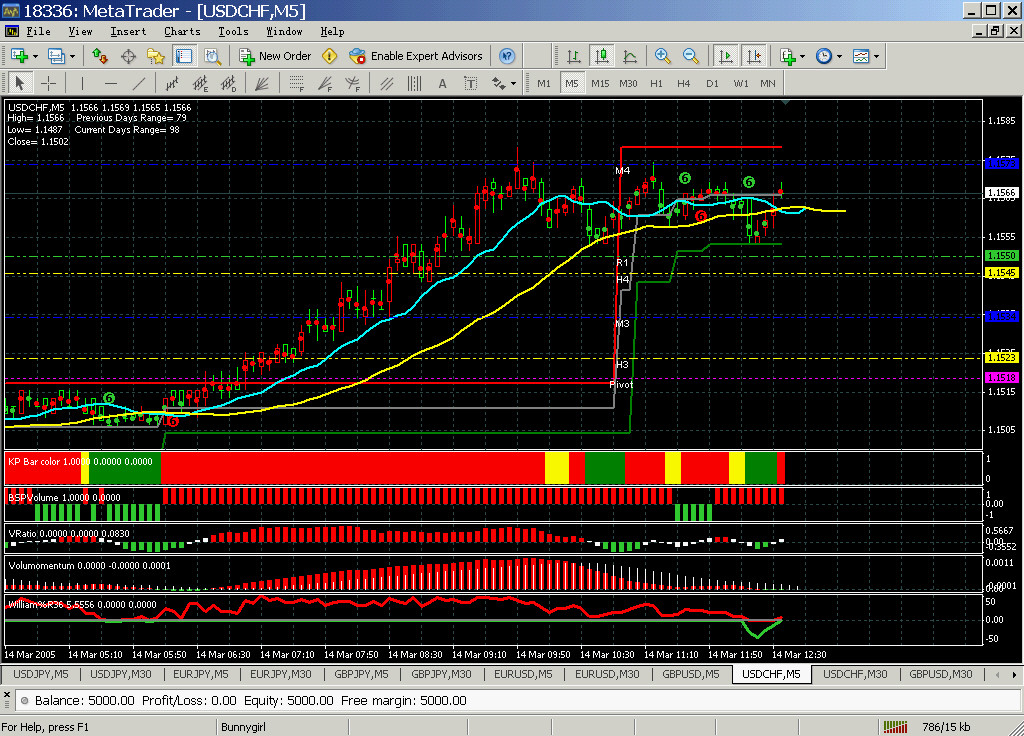
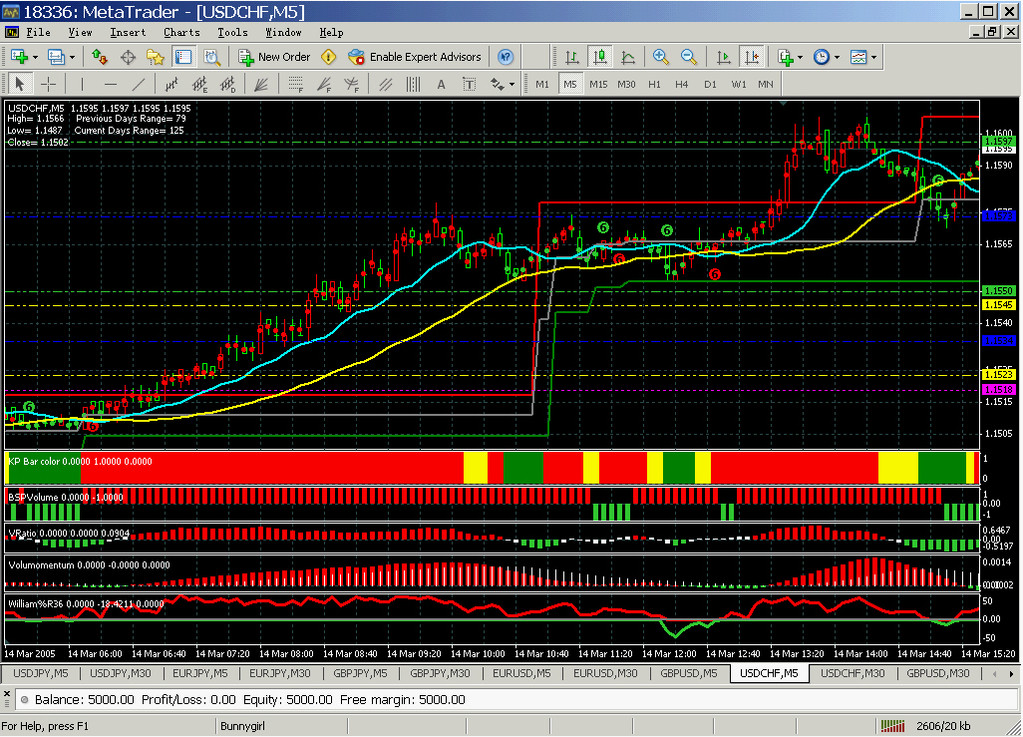
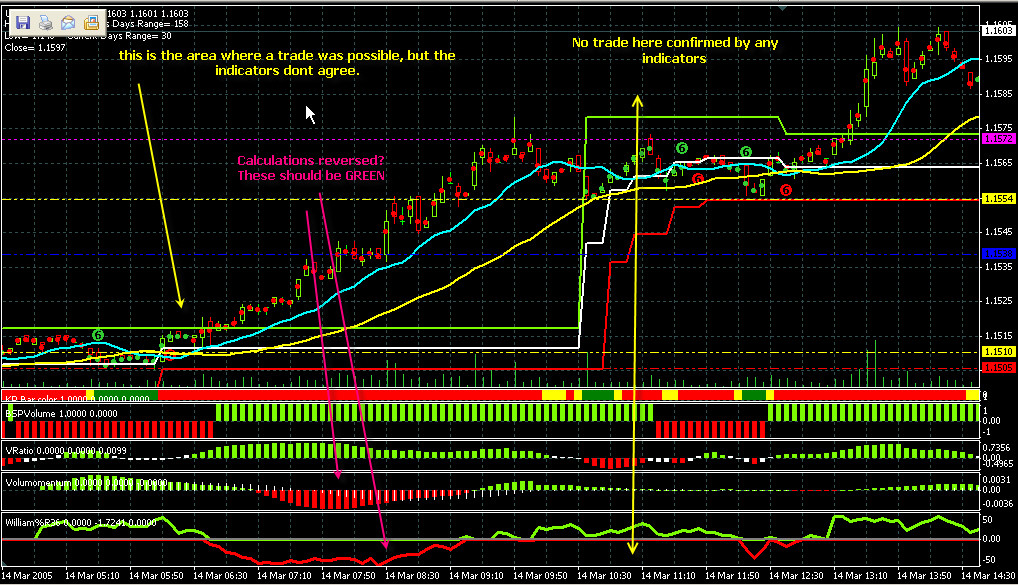
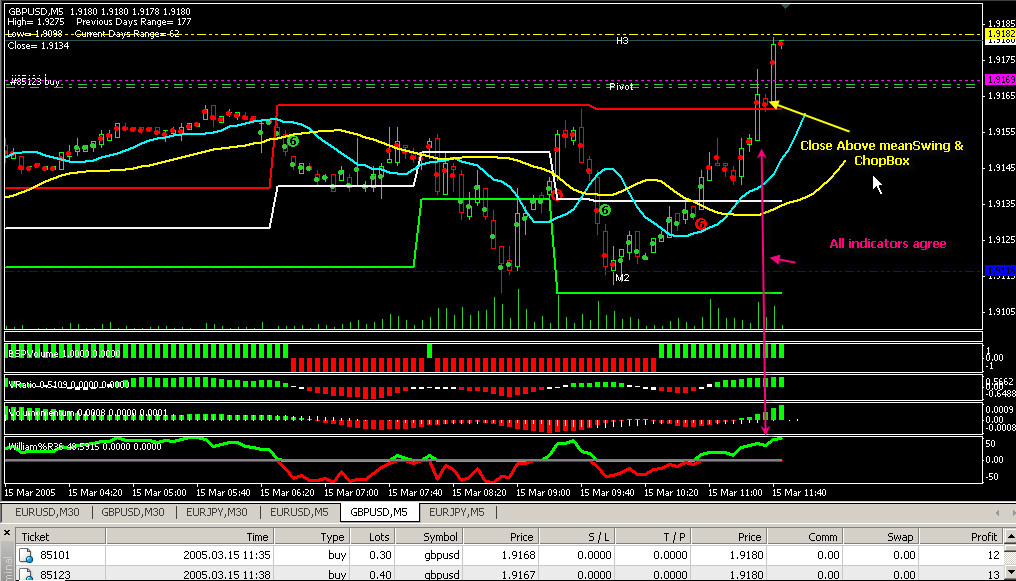
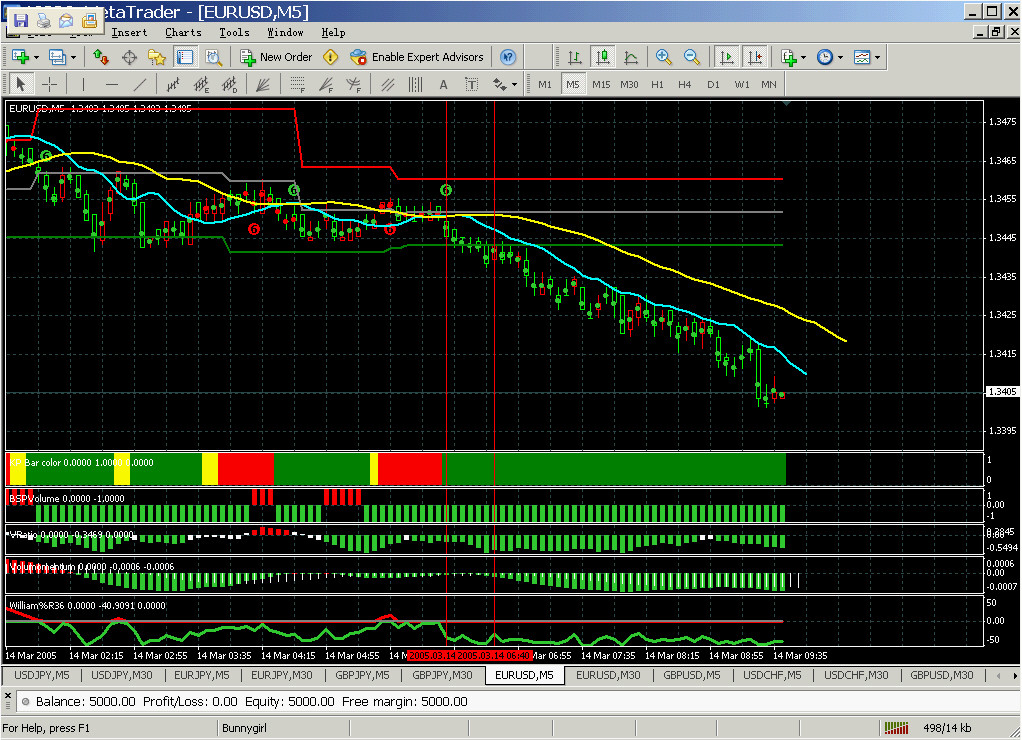
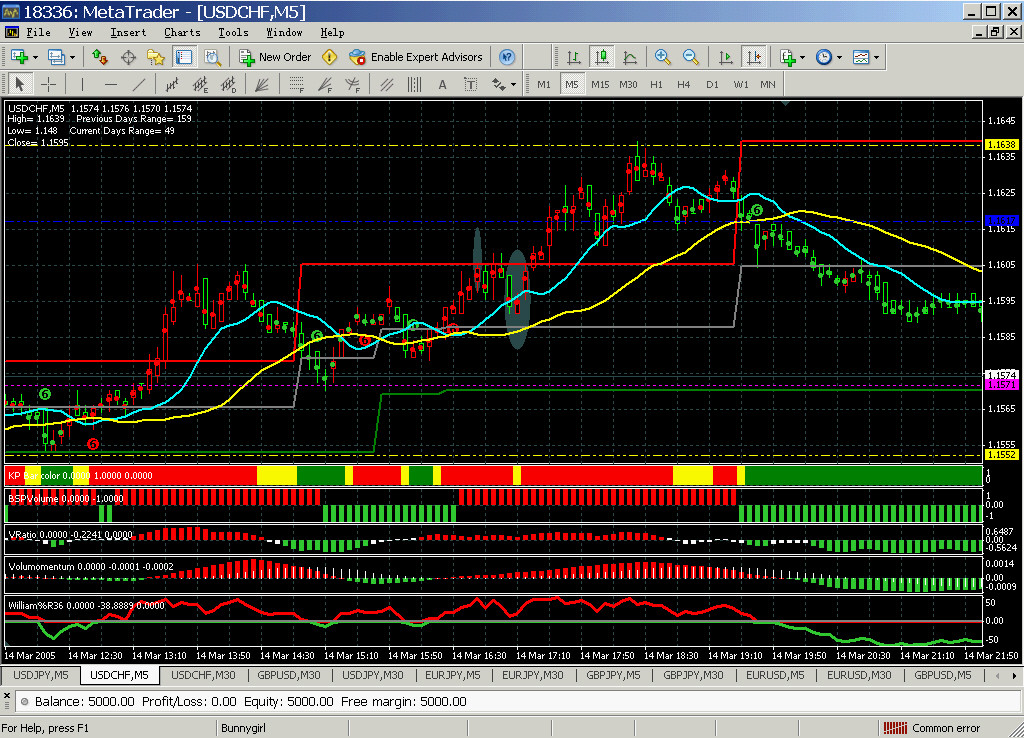
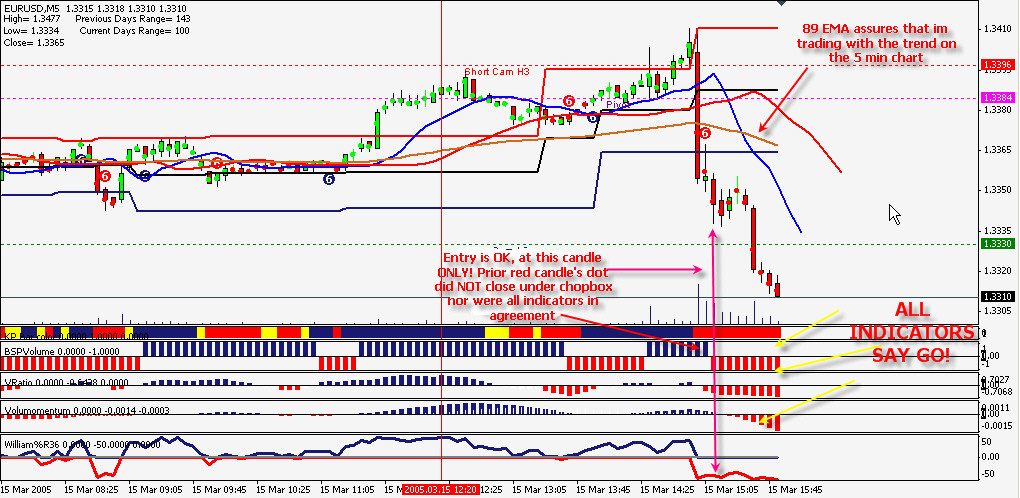
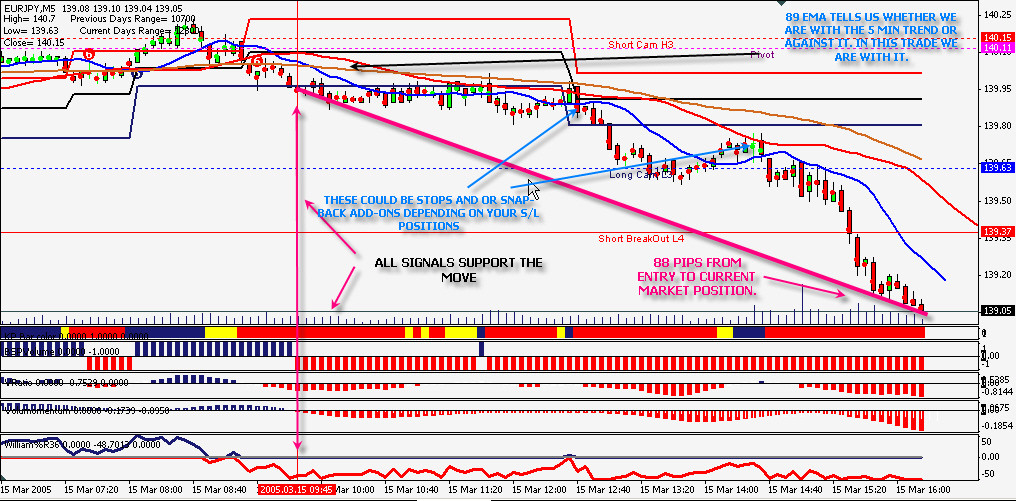
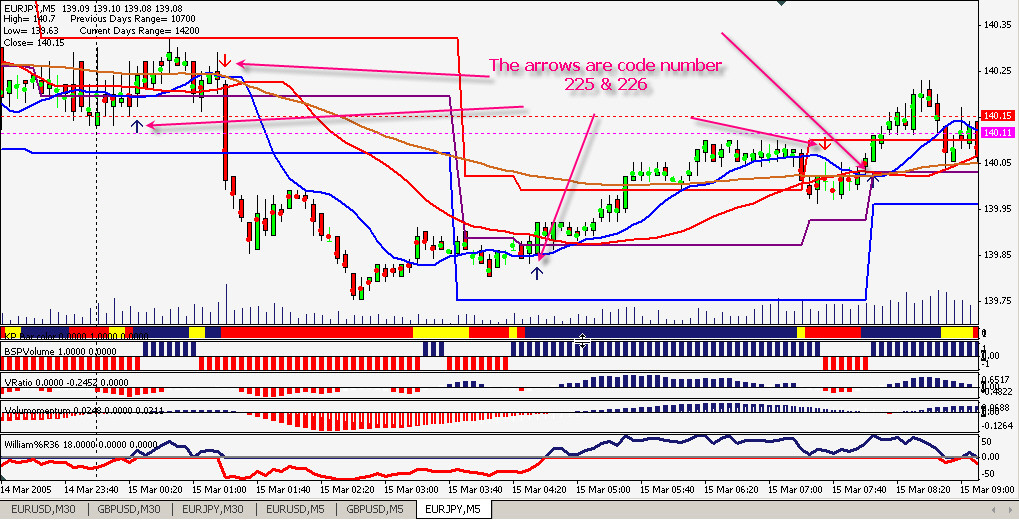
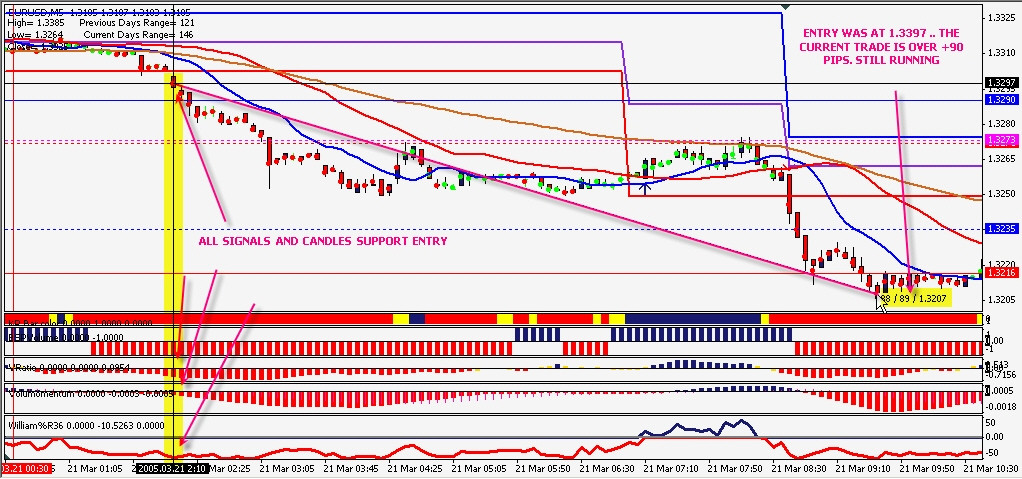
234# KiwiK Trading System
Submit by joy22
Time Frame 5 min, 15min,
currency pairs: majors.
Metatrader Indicators
Balance power, BPS Volume, Buff ma, Dynamic RS, Fast slow, Histo Bands, Kp arrows,
KPS Bar Color, KPV Force, Power Bar, Volum Momenum, V Ratio, William 36. See For rules see examples in the pictures.


6# Volume Spread Analysis - Forex Strategies - Forex Resources
50# Trading System, Black King - Forex Strategies
75# Sputnik - Forex Strategies - Forex Resources - Forex Trading
4# Kumo with Renko Chart - Forex Strategies - Forex Resources ...
349# Trading system kumo - Forex Strategies - Forex Resources ...
301# Easy 15min Trading System
105# Ichimoku - Forex Strategies - Forex Resources - Forex
121# Ichimoku Kinko Hyo Forex Strategy - Forex Strategies -
69# THV Cobra with TudorGirl's Sinc Spectrum Cycle - Forex ...
